EVOLVE Fabrication - Desktop Client
![]() Updated 1 month ago
by
Kerry Poe
Updated 1 month ago
by
Kerry Poe

The Desktop Client serves as a bridge between the platform and connected hardware devices, including CNC benders, barcode scanners, printers, and other equipment. It enables workflows to execute tasks directly on supported machines while providing automation capabilities that reduce manual effort and improve operational efficiency. Through this integration, the Desktop Client helps streamline production and data-driven processes across the organization.

Basic Usage

Startup
- Launch the application. Only one instance is allowed per workstation.
- If not configured, you will be prompted to select a machine profile and configure devices.
Main Window
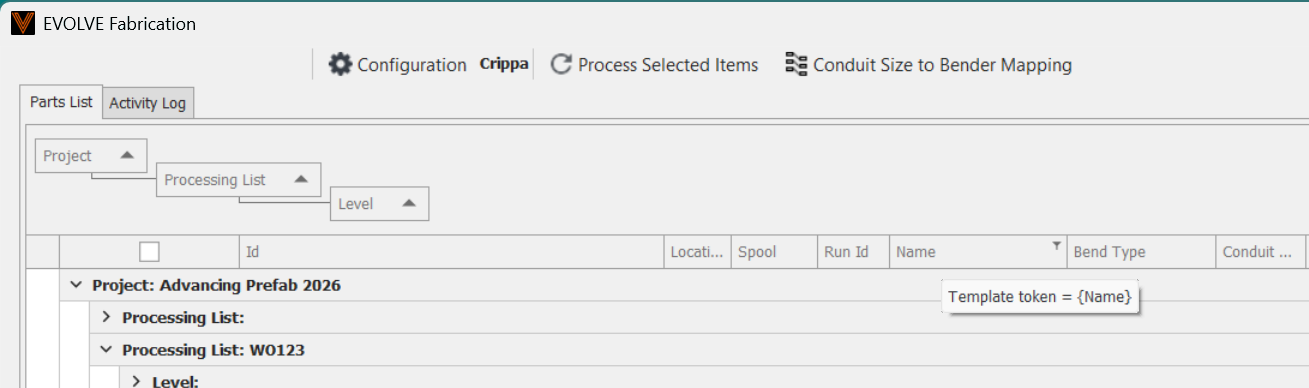
- Parts List: Displays available parts with details (ID, project, size, status, etc.).
- Toolbar: Provides access to login, configuration, refresh, and mapping dialogs.
- Activity Log: Shows real-time log messages and system activity.

Common Actions
- Drag Columns to Sort: Each column can be dragged up/down to build a tree allowing a customized look for the grid.
- Select Parts: Click rows or use checkboxes (if multi-select enabled).
- Process Parts: Double click, Press Enter or use the "Process Selected Items" button to send selected parts to the configured device (bender, label printer, etc.).
- Refresh Data: Press F5 or use the toolbar button to reload all data.
- Clear Selection: Press Escape to clear all selections.
- Configure: Use the configuration button to change profiles, devices, or mappings.
- Map Conduit Sizes: Use the Conduit mapping dialog to associate conduit sizes with bender profiles.
- Generally, this feature is used by label printer machines such that when labels are processed, the Adjusted Length can be calculated for the respective row based on the appropriate bender profile.

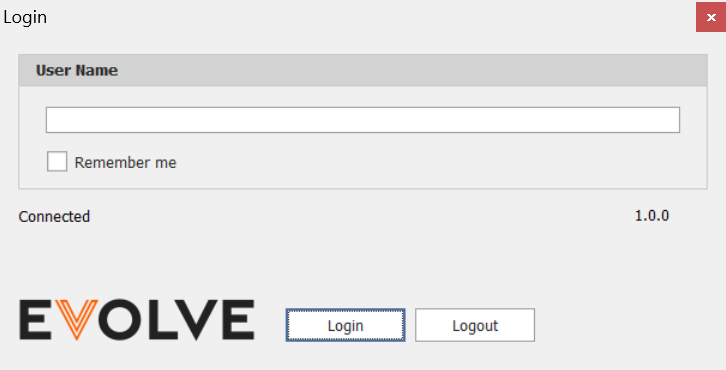
User Login

The application requires a login to the EVOLVE cloud by a user with a license of EVOLVE Fabrication. This login is used to determine the items available for processing by the client.
Configuration Setup

Configuration is managed via the Configuration Dialog (accessible from the toolbar or when prompted at startup if not configured).
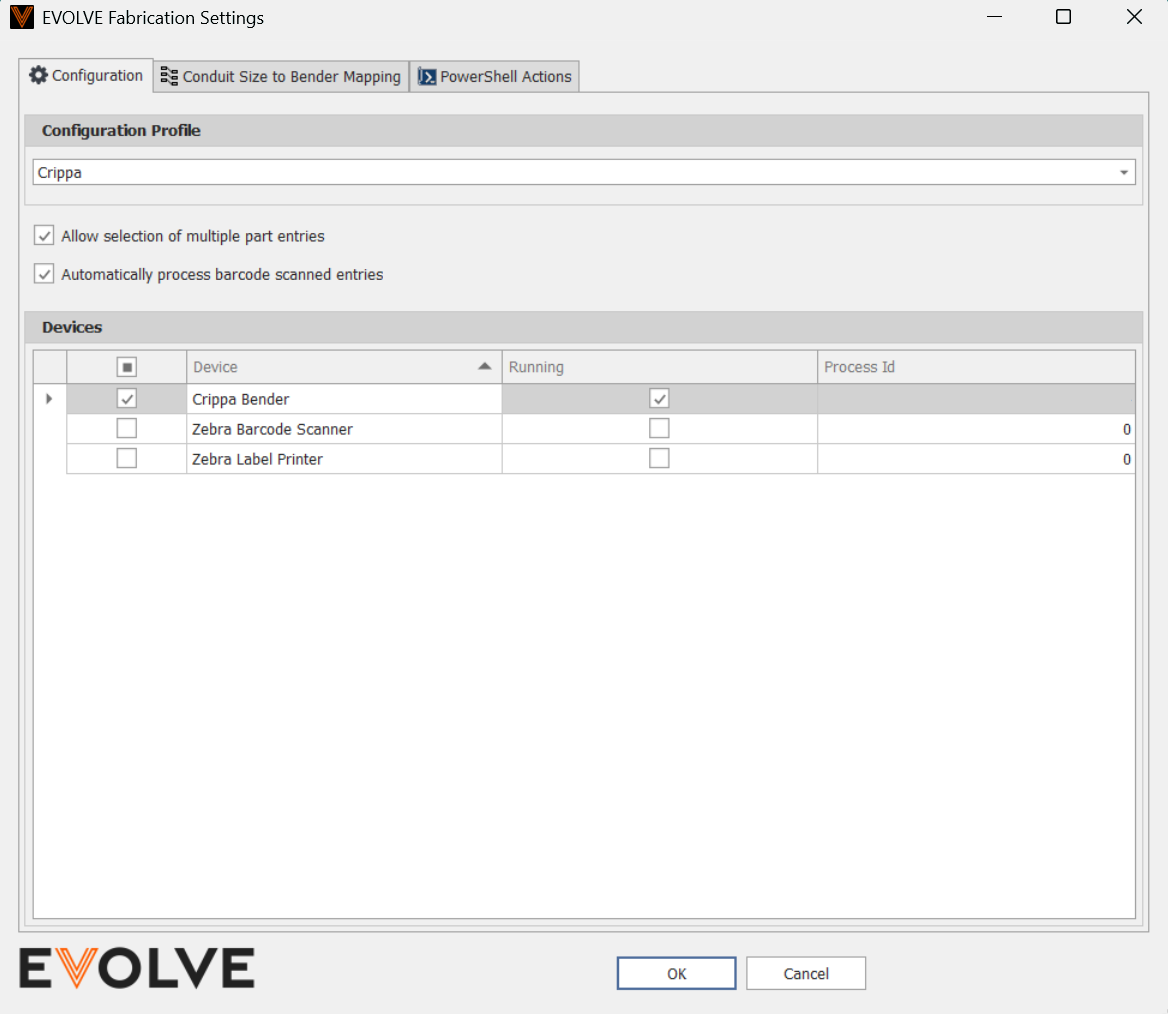
Key Configuration Options
- Profile Selection: Choose the machine profile for the workstation. This determines which device (e.g., Crippa Bender, Zebra Label Printer) is active.
- Devices: Select which devices are active for this client.
- Allow Multiple Selection: Enable or disable multi-select mode in the parts grid.
- Auto Process Barcode Scans: If enabled, barcode scans are processed automatically.
- PowerShell Scripts: Paths to optional PowerShell scripts for:
- Barcode filtering
- Barcode selection
- Item pre-processing
- Item post-processing
- Conduit Size to Bender Mapping: Map conduit sizes to specific bender machine profiles for automated selection.
Configuration is persisted per user in %APPDATA%\eVolve\EVOLVE Fabrication\Configuration.xml. Any manual edits to this file must be performed while the application is completely closed.

Shortcut Keys
Key | Action |
F5 | Refresh data (reloads parts, profiles, conduit info) |
Enter | Process selected parts |
Escape | Clear selection in the parts grid |
Double-click (row) | Process the double-clicked part |
Barcode Scanning
- If a barcode scanner is configured, scans can filter and select parts automatically.
- Enable a barcode scanner by selecting the appropriate device within the Configuration Dialog.
- If "Auto Process Barcode Scans" is enabled, scanned parts are processed immediately.
Advanced

- PowerShell Integration: Custom scripts can be used for advanced filtering, selection, and processing logic.
- Grid Layout: The grid layout and column order are saved/restored per user. This is done automatically.
Troubleshooting

- Only one instance allowed: If you see a message about another instance running, close the other instance before starting a new one.
- Device not configured: If prompted, ensure you select a valid machine profile and device.
- Log Output: Double-click the log area to save logs to a file for support.

Crippa Bender Device

Overview

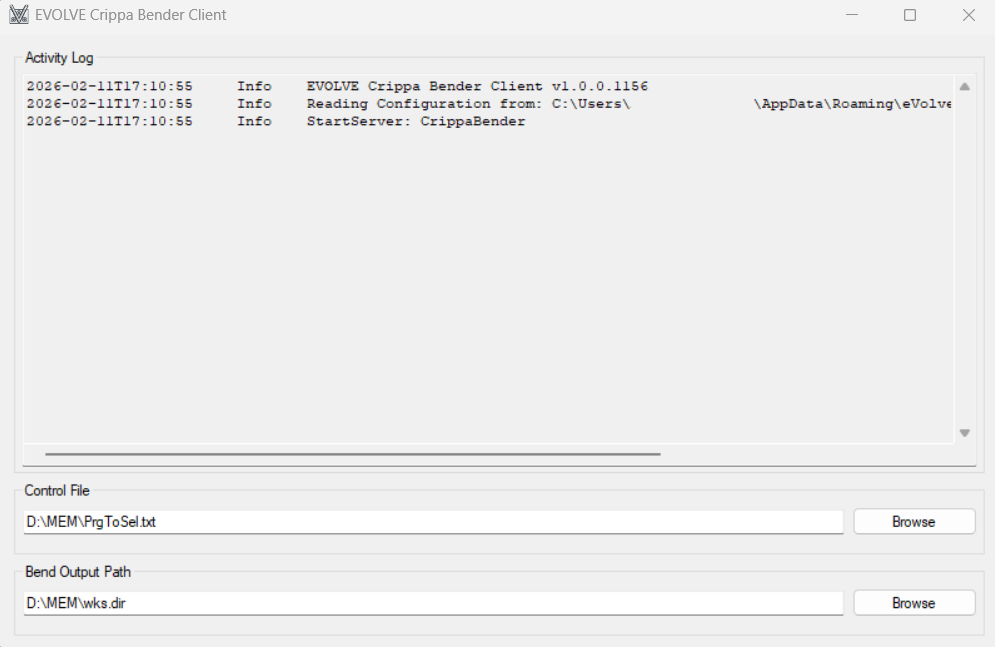
Crippa Bender Client is a Windows application for managing and outputting bend data to a Crippa Bender machine. It provides a simple interface for configuring output paths, monitoring activity, and integrating with the EVOLVE Fabrication Client.
Configuration Setup

Configuration is managed via the main dialog window.
Key Configuration Options
- Control File Path:
- Full path and file name of the control file used to manage bend operations.
- Must point to a valid directory. If the file does not exist, it will be created during execution.
- Set using the "Browse" button next to the control file field or can be manually entered.
- Bend Output Path:
- Directory where output bend files are saved.
- Must be a valid, existing directory.
- Set using the "Browse" button next to the output path field or can be manually entered.
- Retain/Delete Existing Output:
- (Configured by editing the configuration file directly while the program is closed.)
- Enabled by default, all existing output files matching the bend file pattern are deleted before new files are generated.
- This ensures only the latest output files are present.
Configuration is saved automatically and persists per user in %APPDATA%\eVolve\Crippa Bender Client\Configuration.xml. Any manual edits to this file must be performed while the application is completely closed.
Basic Usage

Startup
- The application is launched automatically by the EVOLVE Fabrication Client as needed based on the configuration.
- The application cannot be launched manually or standalone.
- The main dialog shows configuration fields and a log output area.
- Any detected configuration errors are shown in a message dialog on startup. Address any issues before sending data.
Main Window
- Control File Path:
- Set the path to the control file. This file is updated with the name of the latest bend file after processing.
- (e.g.
D:\MEM\PrgToSel.txt)
- (e.g.
- Set the path to the control file. This file is updated with the name of the latest bend file after processing.
- Bend Output Path:
- Set the directory where bend files will be written.
- (e.g.
D:\MEM\wks.dir\evolve)
- (e.g.
- Set the directory where bend files will be written.
- Activity Log:
- Displays real-time log messages and system activity.
Common Actions
- Configure Paths:
- Use the "Browse" buttons to select the control file and output directory.
- Ensure both paths are valid and accessible.
- Monitor Activity:
- The log area displays all actions, errors, and file operations.
- Double-click the log area to save its contents to a file.
Processing Bend Data
- The application receives bend data from the EVOLVE Fabrication Client.
- For each part:
- Validates and processes the bend data.
- Writes output files (
.mpfand.ybc) to the configured output directory. - Updates the control file with the name of the latest output file.
- Deletes existing output files if configured to do so.
System Tray
- Minimizing or closing the window sends the application to the system tray.
- Right-click the tray icon for options to restore or exit.
Troubleshooting

- Only one instance allowed: If you see a message about another instance running, close the other instance before starting a new one.
- Invalid Path: Ensure the control file and output directory exist and are accessible.
- Log Output: Double-click the log area to save logs to a file for support.

Zebra Barcode Scanner Device

Overview

Zebra Barcode Scanner Client is a Windows application for connecting to a Zebra barcode scanner, receiving barcode scans, and integrating scanned data with the EVOLVE Fabrication Client. It provides a simple interface for monitoring scan activity and logging events.
Configuration Setup


This device requires the Zebra Barcode Scanner SDK to be installed on the Windows machine.
Configuration is handled automatically. No manual configuration is required for most users.
- Scanner Connection:
- The application expects the Zebra scanner to be connected via SNAPI (USB).
- On startup, the application detects the connected scanner and subscribes to barcode scan events.
- Logging:
- All activity and scan events are logged in the application's log area.
Configuration is saved per user in %APPDATA%\eVolve\Zebra Barcode Scanner Client\Configuration.xml. Any manual edits to this file must be performed while the application is completely closed.
Basic Usage

Startup
- Connect your Zebra barcode scanner to the computer via USB (SNAPI).
- The application is launched automatically by the EVOLVE Fabrication Client as needed based on the configuration.
- The application cannot be launched manually or standalone.
- The main dialog will appear, showing scan status and a log output area.
- Any detected configuration errors are shown in a message dialog on startup. Address any issues before sending data.
Main Window
- Scan Status:
- On startup, the application lists all detected scanners (model, serial number, interface).
- Displays "Connected. Listening for scans." when ready.
- Activity Log:
- Shows all scan events, errors, and system activity.
- Double-click the log area to save its contents to a file.
Scanning Barcodes
- When a barcode is scanned:
- The application logs the scan event and barcode data.
- The scanned data is sent to the EVOLVE Fabrication Client for processing.
- Any response from the server is logged.
System Tray
- Minimizing or closing the window sends the application to the system tray.
- Right-click the tray icon for options to restore or exit.
Troubleshooting

- Only one instance allowed: If you see a message about another instance running, close the other instance before starting a new one.
- No scanners detected: Ensure your Zebra scanner is connected via USB and recognized by Windows. Restart the Evolve Fabrication Client.
- Log Output: Double-click the log area to save logs to a file for support.

Zebra Label Printer Device
Overview

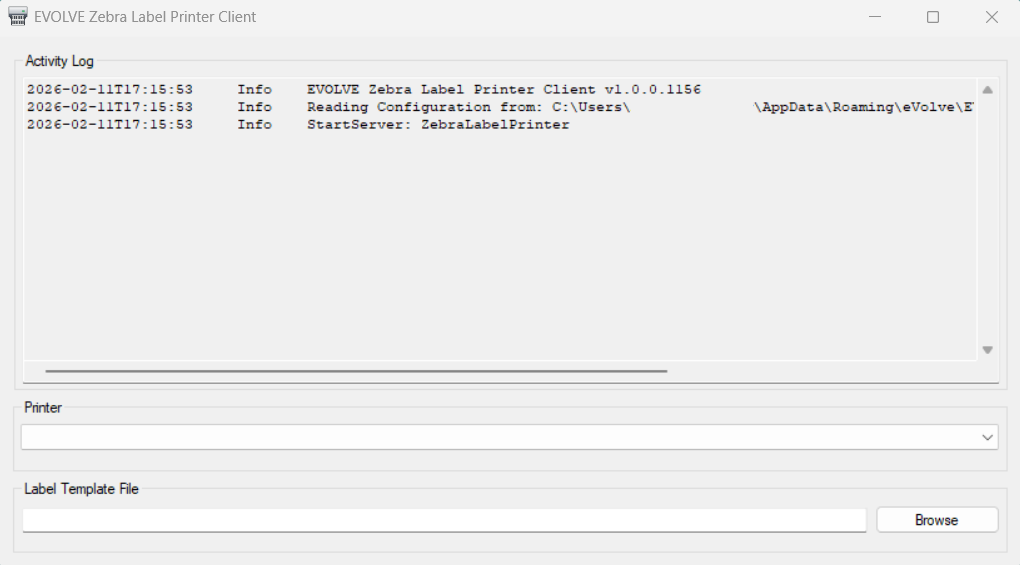
Zebra Label Printer Client is a Windows application for printing labels using a Zebra label printer. It integrates with the EVOLVE Fabrication Client to receive part data, format labels using a template, and send print jobs to the configured printer.
Configuration Setup

This device requires the Zebra Printer Drivers to be installed on the Windows machine.
Configuration is managed via the main dialog window.
Key Configuration Options
- Printer Connection:
- Select the type of connection for the Zebra label printer (e.g., USB).
- Set the printer name as recognized by Windows.
- Label Template File Path:
- Use the Zebra Label Template Software to create templates.
- Specify the file path to the label template used for printing.
- This is exported to a
PRNfile which is generated by printing a label template using the "Print to File" option.
- This is exported to a
- The template should contain tokens that will be replaced with part data.
- Token values are found by hovering over a column header of the part grid of the EVOLVE Fabrication Client. For example, hovering over the Length column would show a token value of
{LengthDisplay}
- Token values are found by hovering over a column header of the part grid of the EVOLVE Fabrication Client. For example, hovering over the Length column would show a token value of
- Printer Name:
- Enter the name of the Zebra printer as it appears in Windows.
Configuration is saved automatically and persists per user in %APPDATA%\eVolve\Zebra Label Printer Client\Configuration.xml. Any manual edits to this file must be performed while the program is closed.
Basic Usage

Startup
- Connect your Zebra label printer to the computer (via USB).
- The application is launched automatically by the EVOLVE Fabrication Client as needed based on the configuration.
- The application cannot be launched manually or standalone.
- The main dialog will appear, showing configuration fields and a log output area.
- Any detected configuration errors are shown in a message dialog on startup. Address any issues before sending data.
Main Window
- Printer Connection:
- Select the connection type and enter the printer name.
- Label Template:
- Set the path to the label template file.
- Activity Log:
- Displays real-time log messages and system activity.
Printing Labels
- The application receives part data from the Machine Control Client system.
- For each part:
- Validates the data and loads the label template.
- Performs token substitution to fill in part details.
- Sends the formatted label to the configured Zebra printer.
- Logs the result of each print job.
- Minimizing or closing the window sends the application to the system tray.
- Right-click the tray icon for options to restore or exit.
Troubleshooting

- Only one instance allowed: If you see a message about another instance running, close the other instance before starting a new one.
- Printer not set: Ensure the printer connection type and name are correctly configured.
- Label template file not found: Verify the template file path is correct and accessible.
- Log Output: Double-click the log area to save logs to a file for support.

Zebra Label Design
Overview
Zebra Designer is a Windows application for designing labels to be used with a Zebra label printer. It is a standalone application not supported by Evolve. The following are instructions for building a smart label to use
Configuration Setup
This device requires the Zebra Designer 3 Label Design Software to be installed on the Windows machine.
Configuration of the label is done inside the Zebra software.
Key Configurations
- Select Printer:
- Select the type of printer you plan to use for the label.
- Define Label:
- Select the type of label, rolls, sheets, etc.
- Select the label orientation.
- Define the label size.
- Build Label Template File:
- Use the Text, Barcode, and Picture tools to build your label.

- Collect the Token names you wish to include on your label by hovering the cursor over the column.
- Select images you wish to include.
- Clicking Embed is suggested. If you don't the image must remain in the folder.
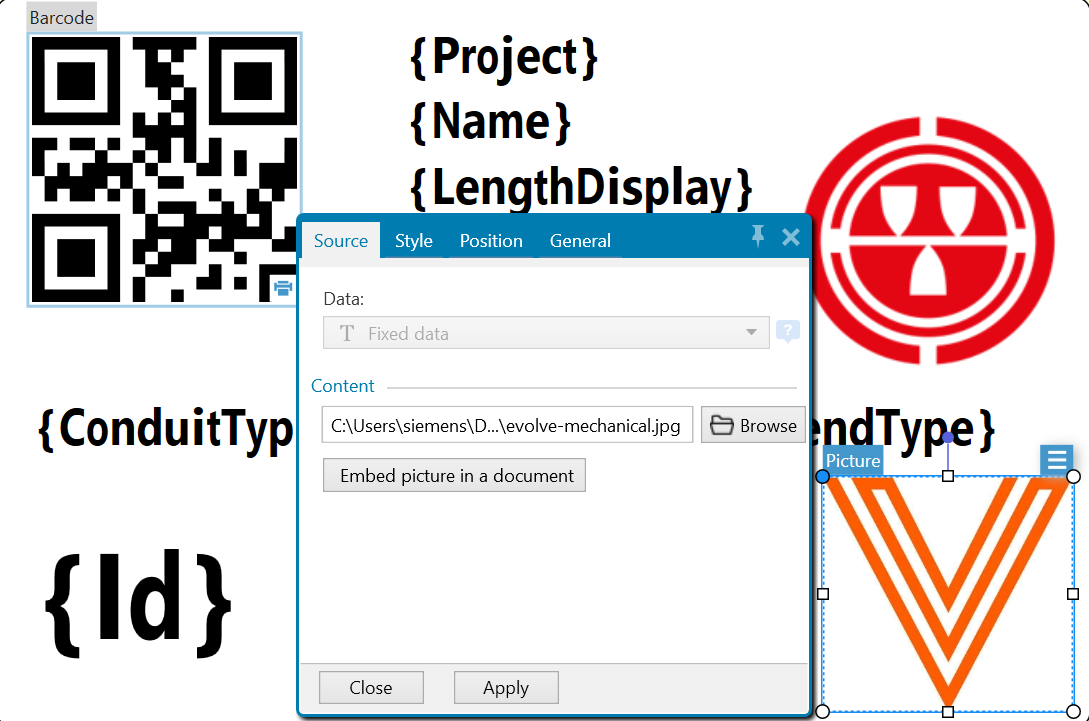
- Add text to the label.
- Using
{}will allow for inserting of the token from the Evolve Fabrication client.
- Using

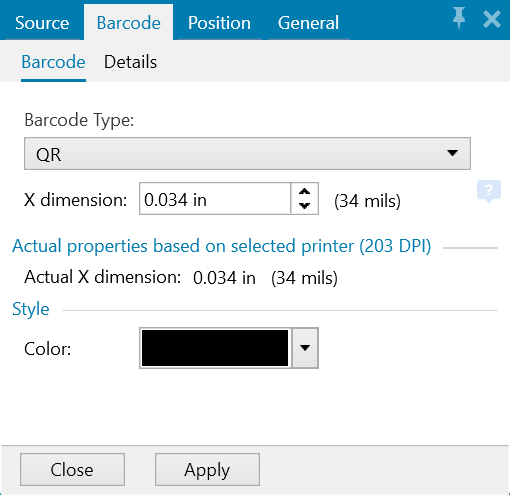
- Add the QR code
{Id}is the required token.
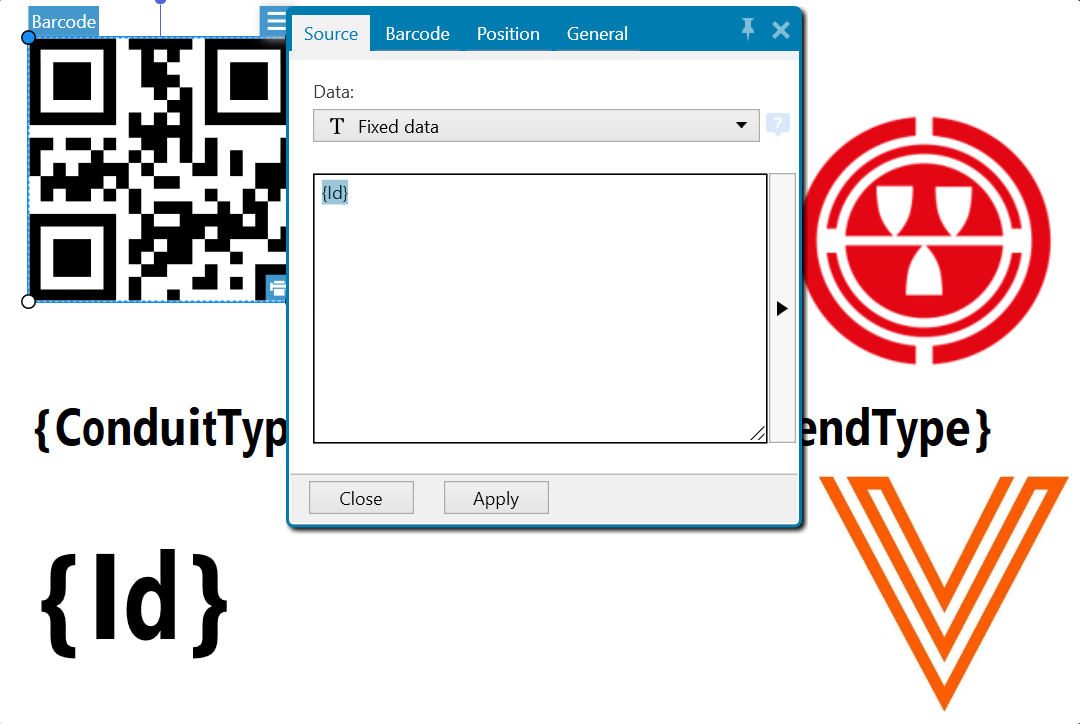
- Select the type of code to be QR for use with the Zebra Scanner.
Generate Label File
- The Evolve Fabrication Client uses a
PRNfile to populate token fields and print the label. - To create the
PRNfile simply select print within the Zebra Designer and select the check box "Print to file" - This will export the label design to a
PRNfile.
- Use the Text, Barcode, and Picture tools to build your label.

Quality Assurance

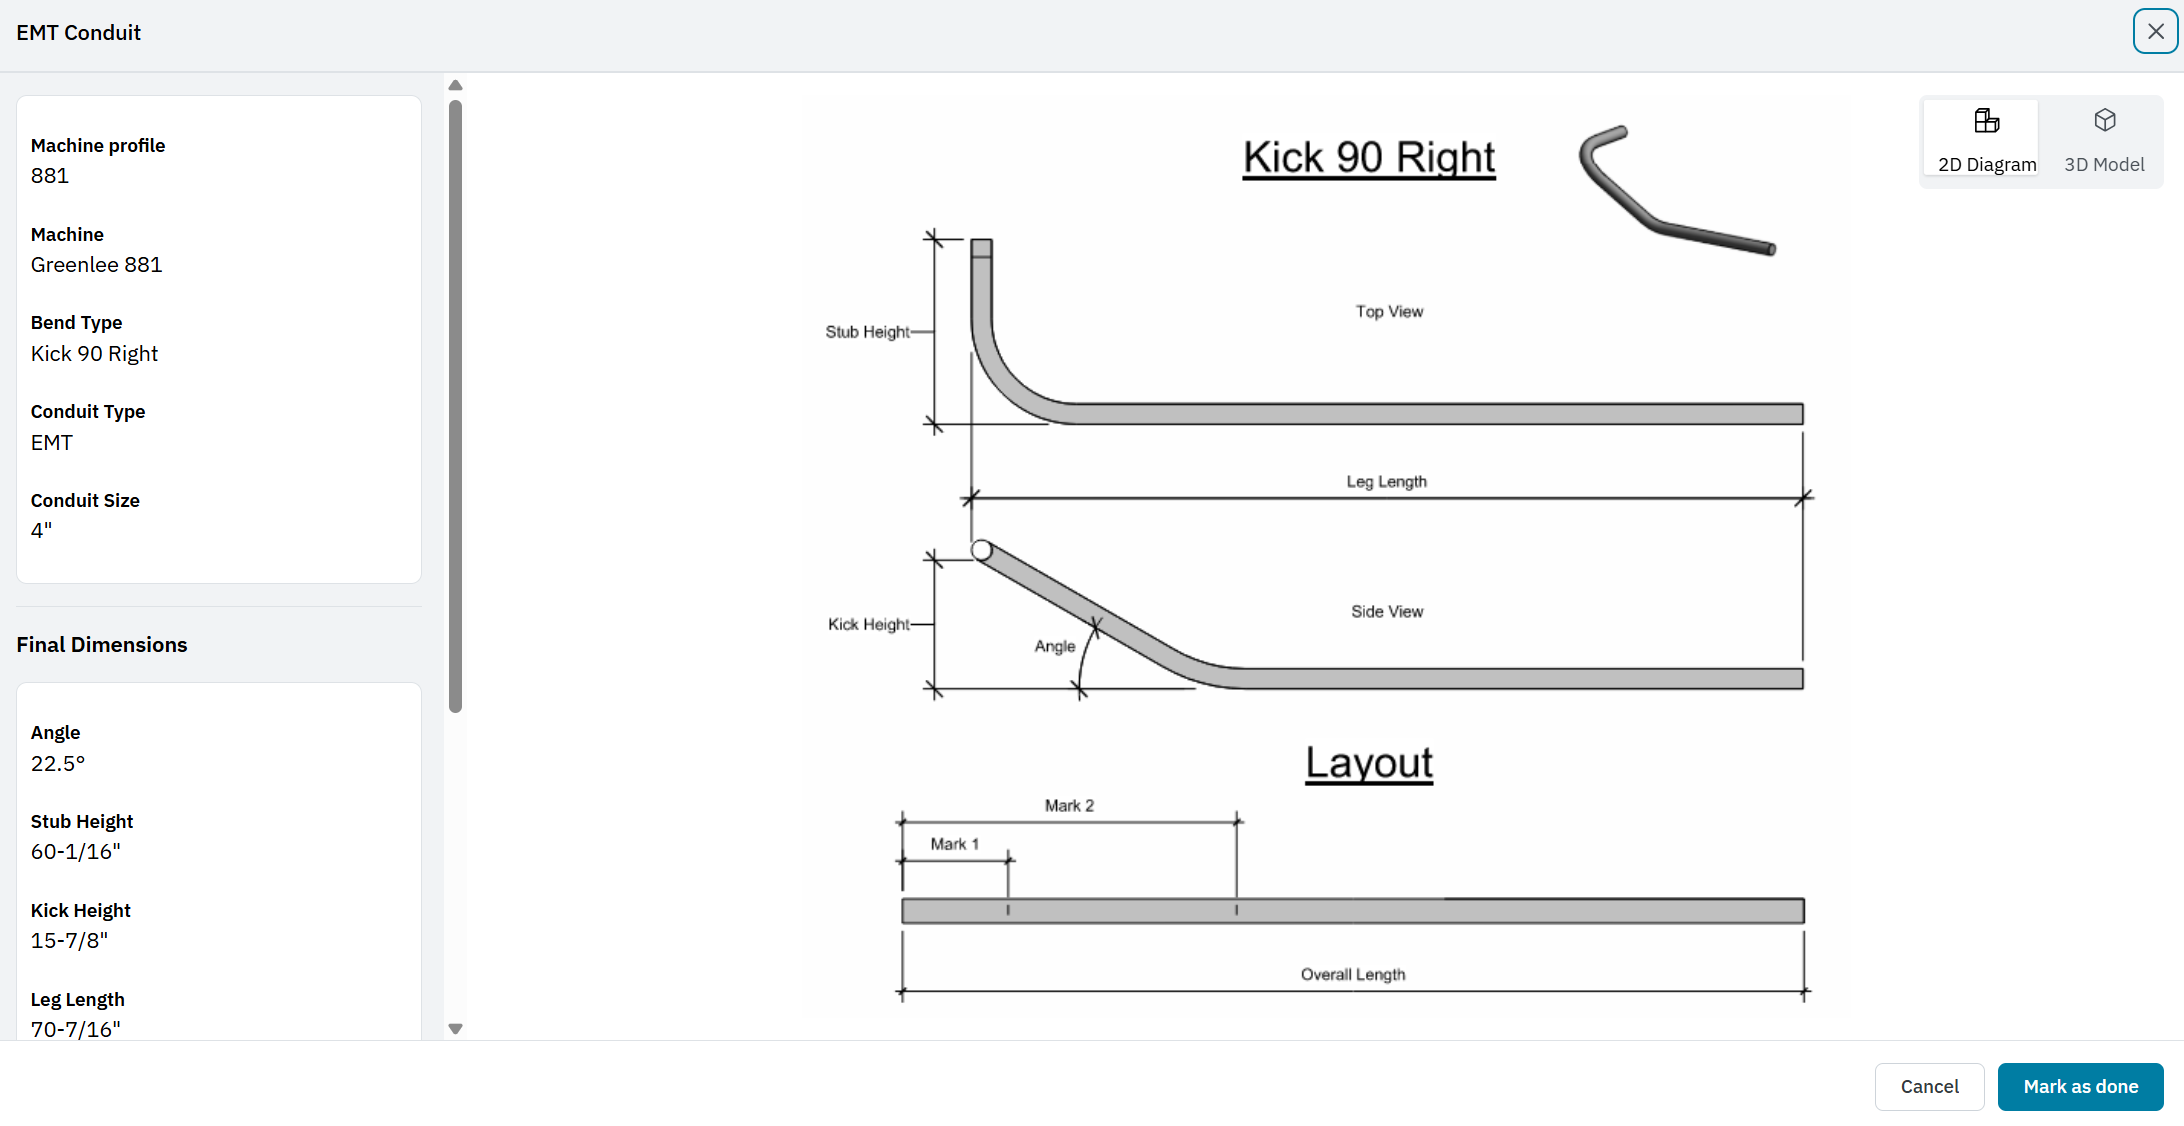
Overview

The Quality Assurance Client interfaces can be used with or without the Barcode scanner Client.
When a selected part is processed, the Evolve website is launched in the default web browser.
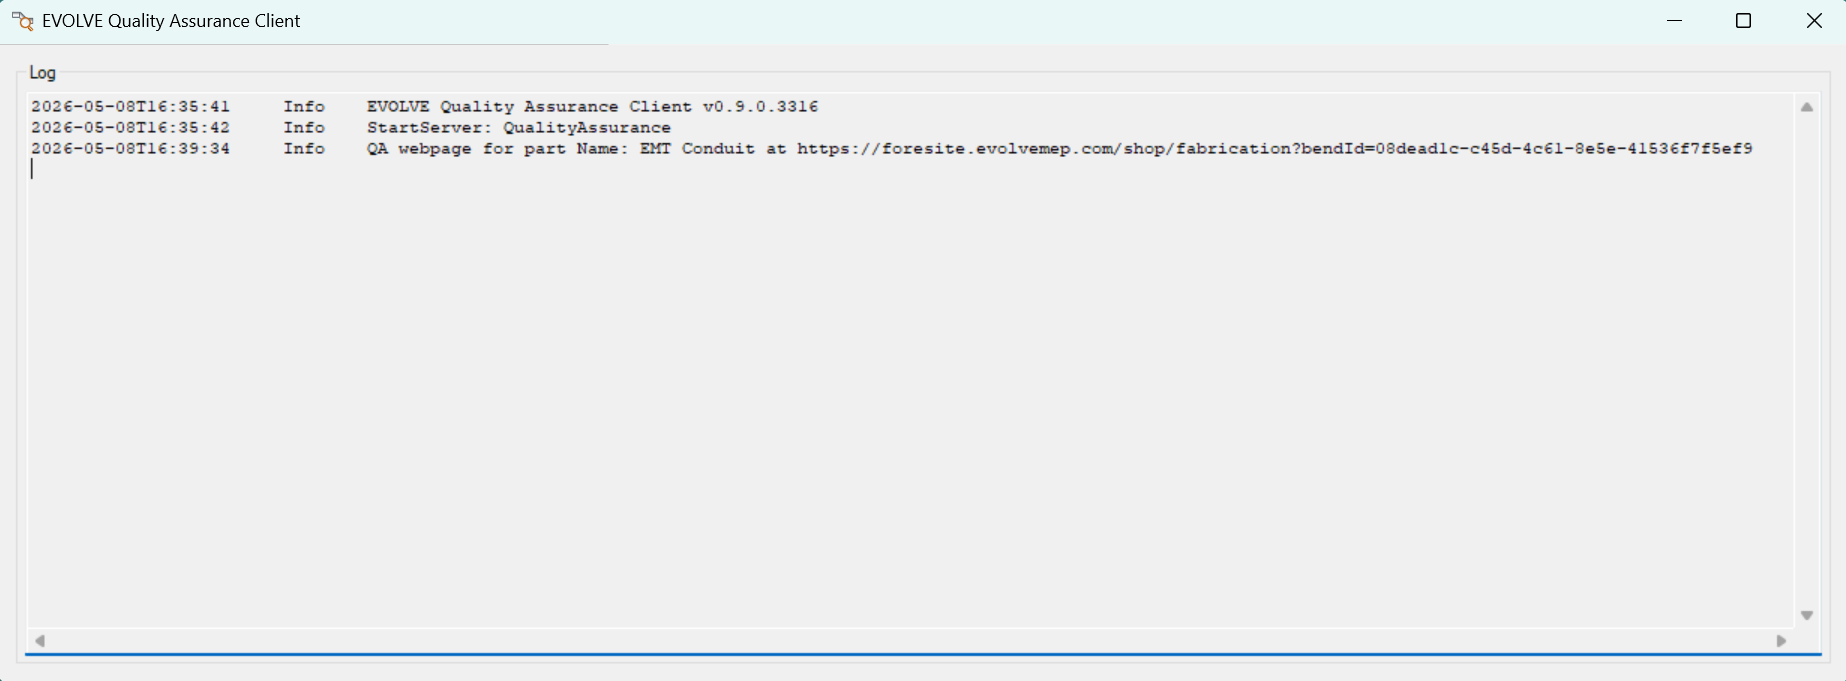
The relavent bend data is displayed to layout the bend and check the final dimensions.
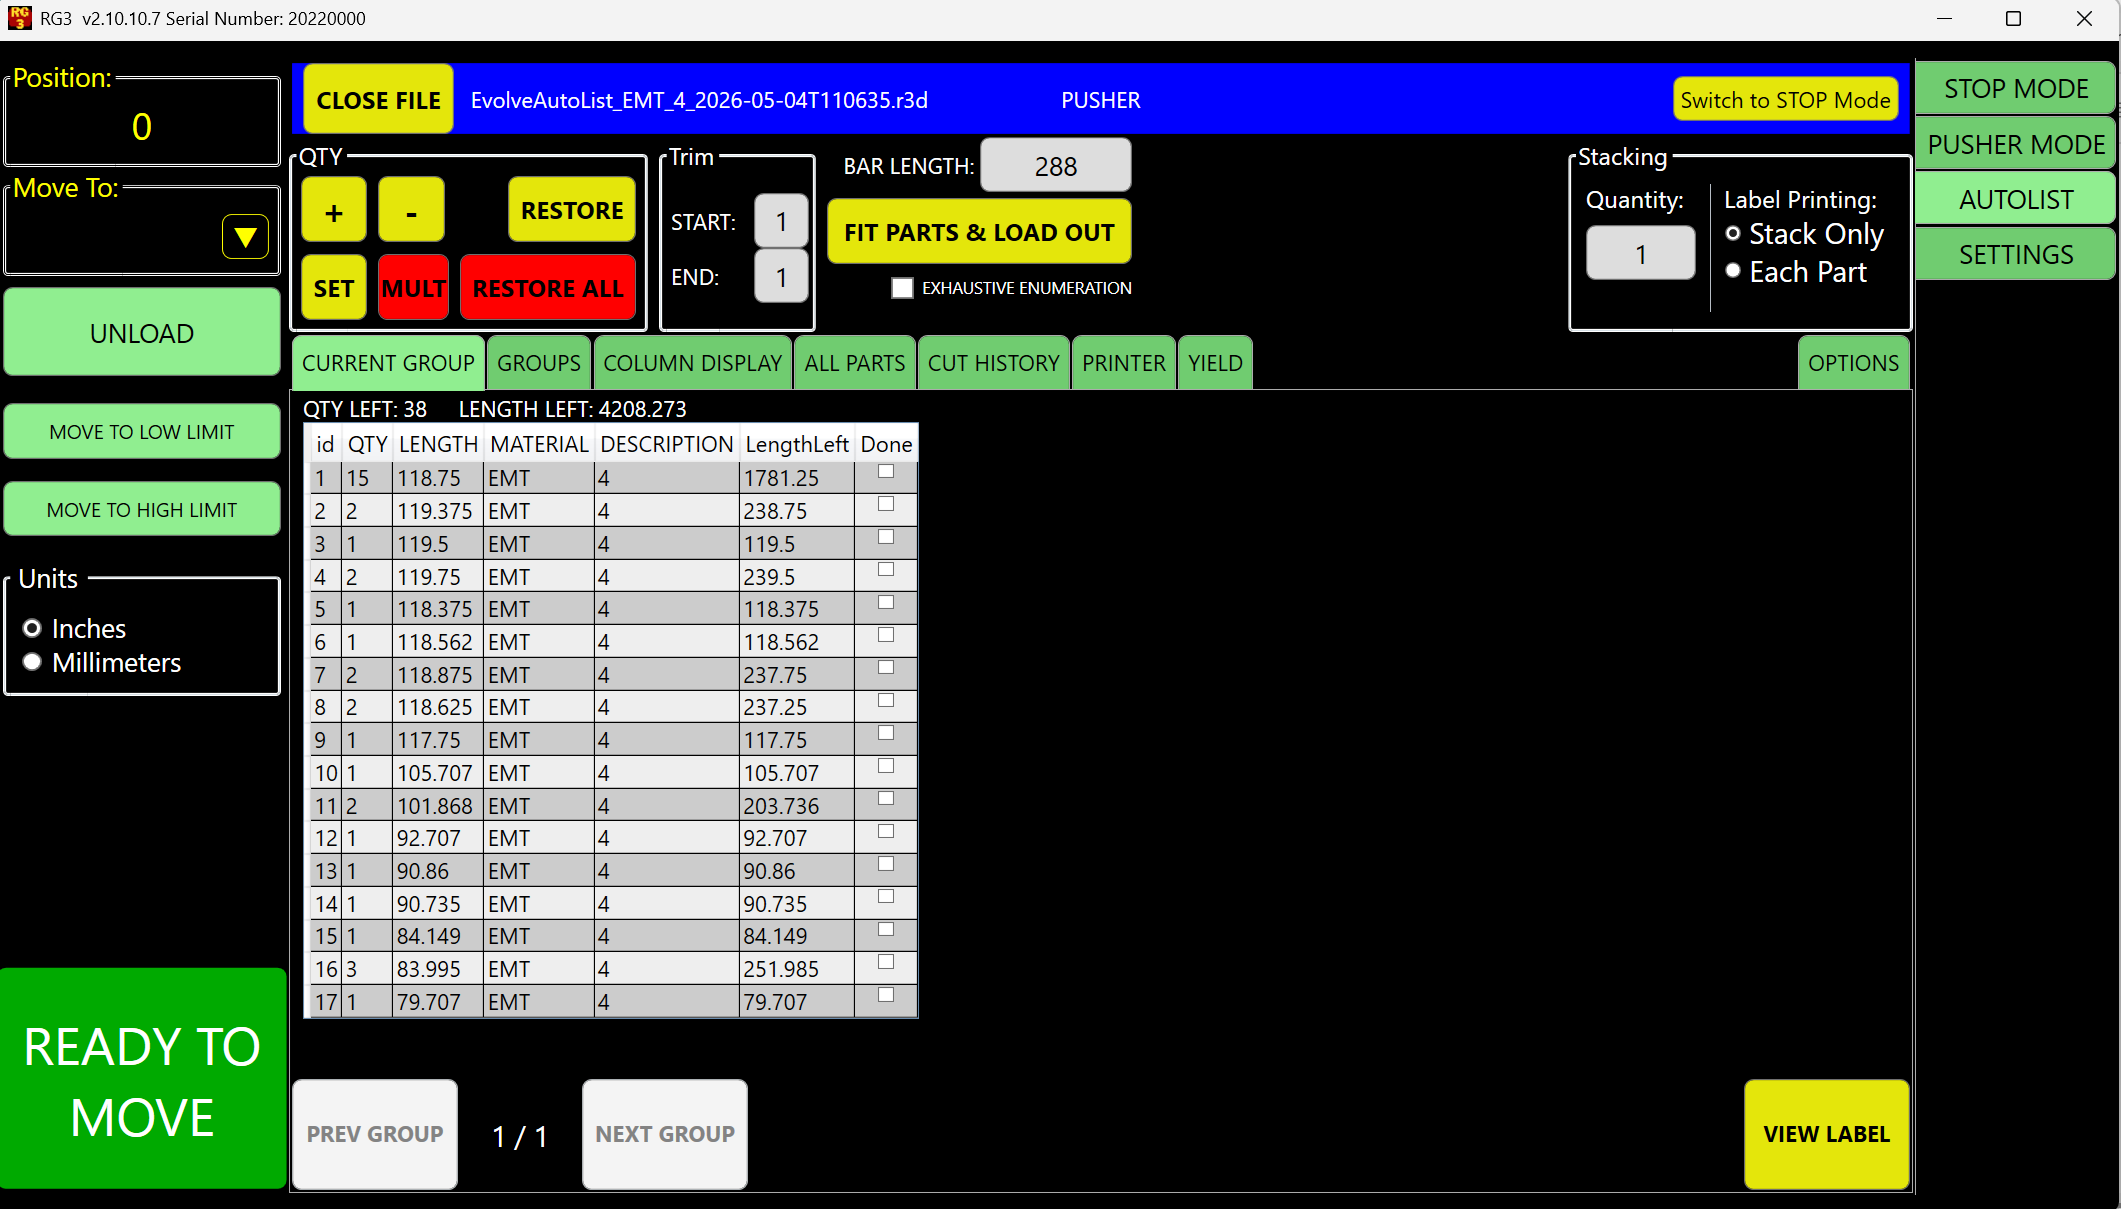
Razor Gage Autolist
Overview
The RG Autolist client loads a .CSV file with the selected parts to the file location selected by the user.
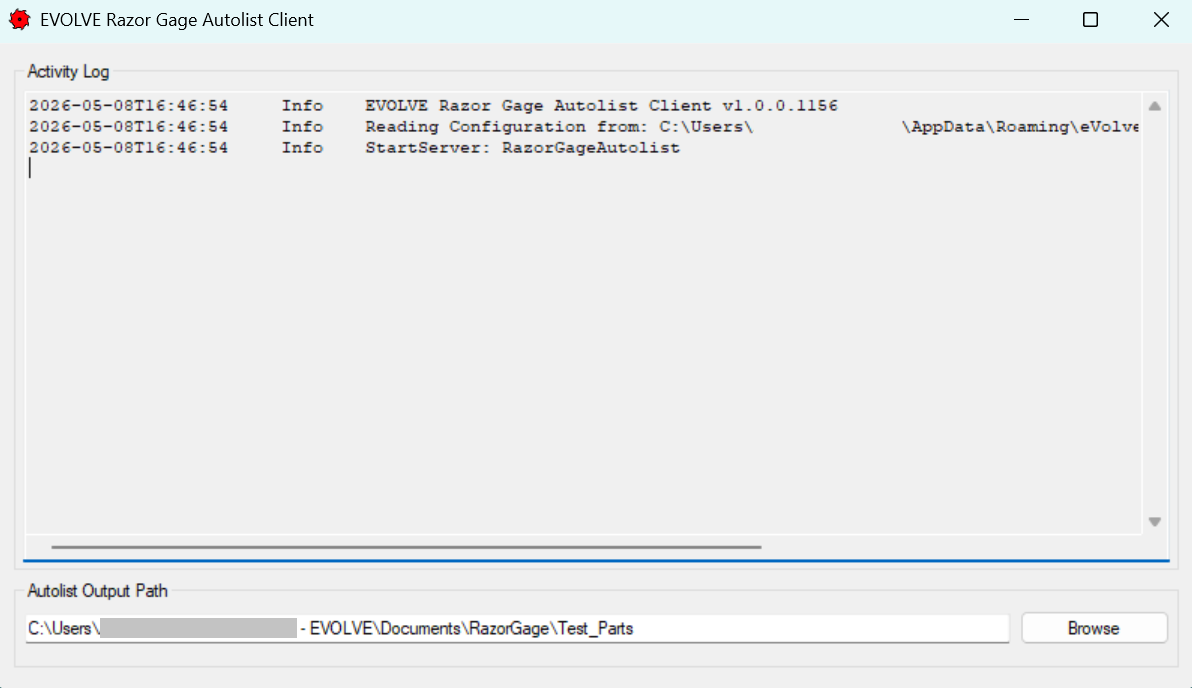
The .CSV file has a specific format to be accepted by the Autolist feature of the Razor Gage. To use the Autolist feature, a RG3Mapping.db file must be included to allow the RG software to correctly interpret the .CSV file. you can get the file here: Evolve Sharepoint Put the RG3Mapping.db file in the same directory where the .CSV files are going to be loaded.

Select the AUTOLIST button on the right.
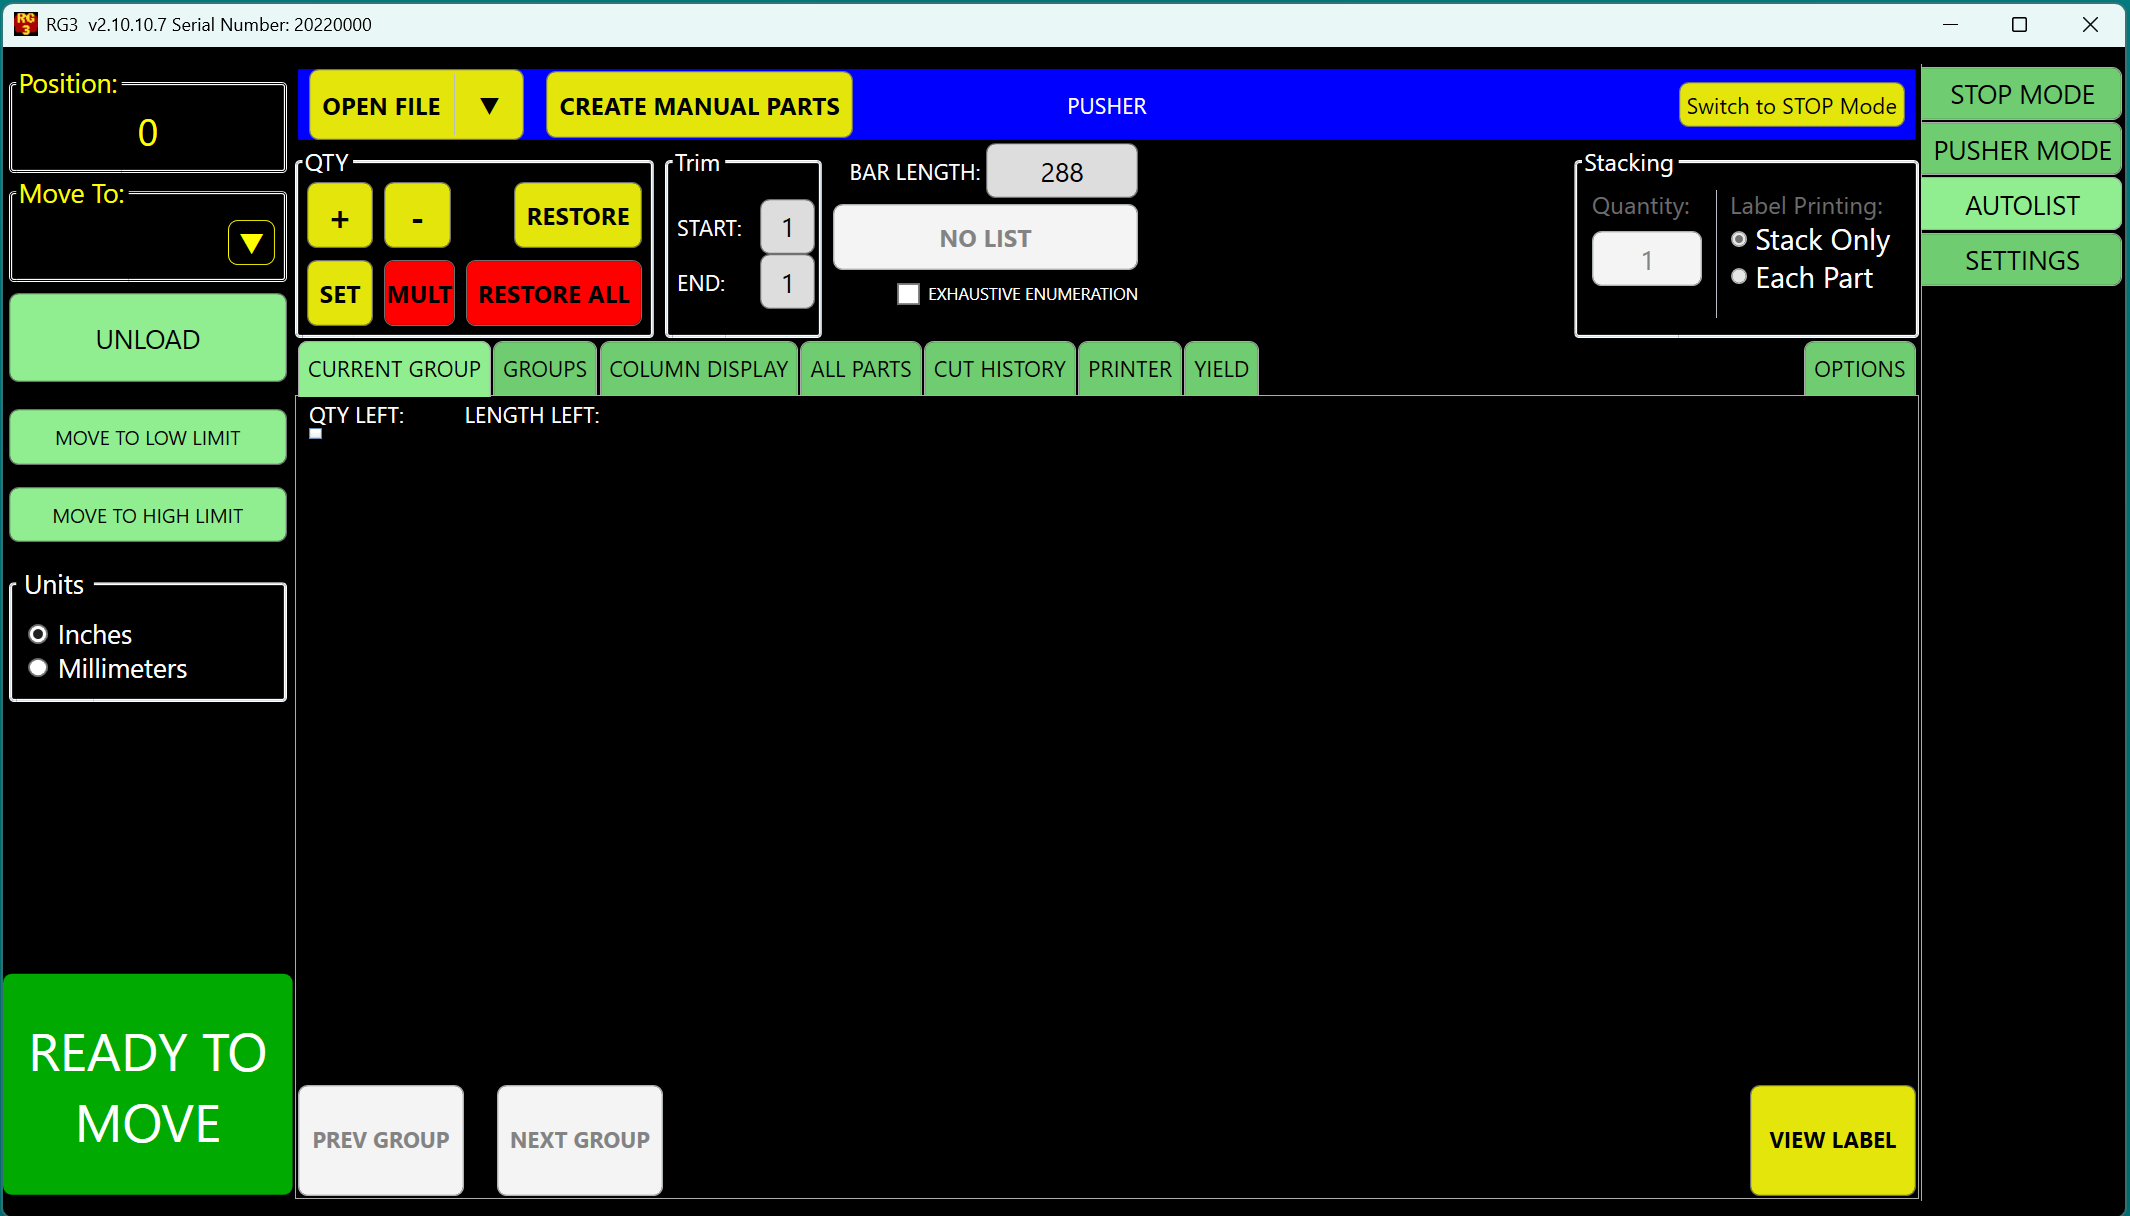
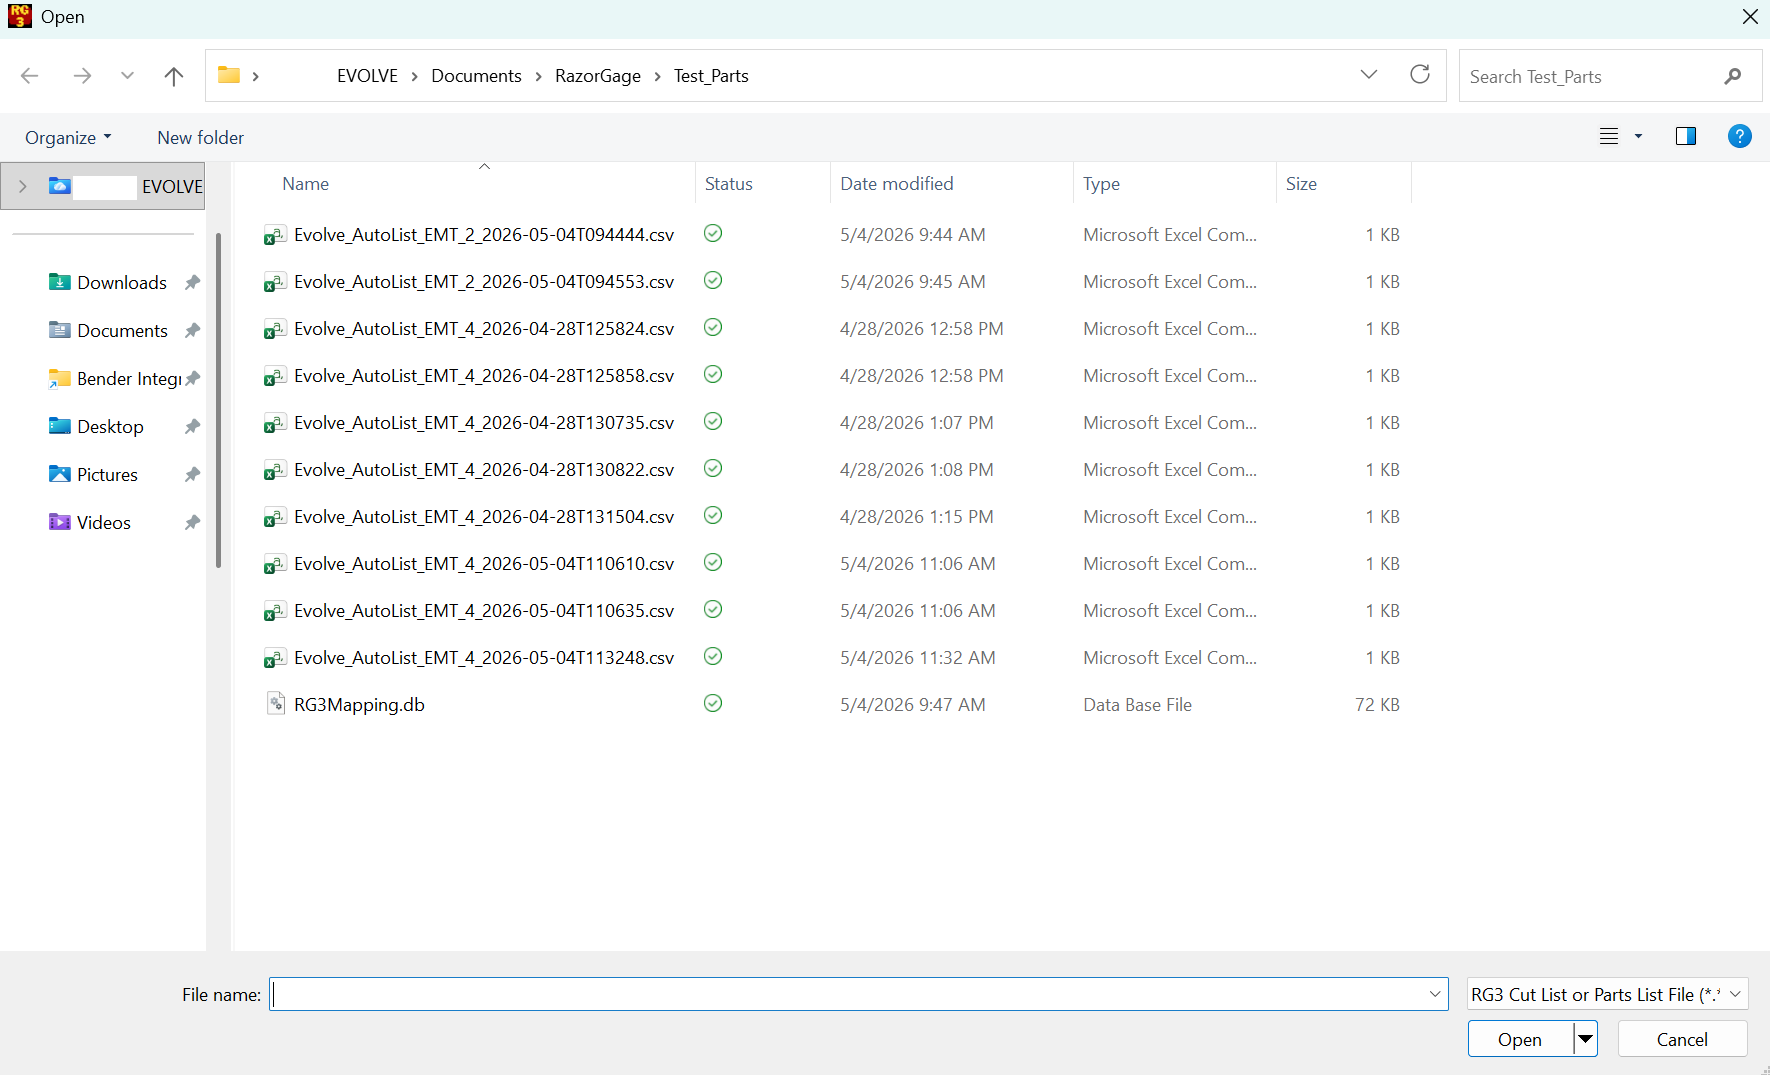
Select the OPEN FILE button and browse to the configured file storage location.
The Razor Gage software will combine the .db and .CSV files to create a .r3d. This file is loaded into the Autolist. If any parts are short enough to be cut from the same piece of conduit, they will be nested to do so, otherwise, the parts are grouped by quantity and listed from longest to shortest.