EVOLVE SSO
![]() Updated 3 months ago
by
Adam Heon
Updated 3 months ago
by
Adam Heon
EVOLVE makes it easy to streamline your login experience with Single Sign-On (SSO), available for an additional fee. Our team will guide you through every step of the process to ensure a smooth, secure setup.
For details or to get started, contact your account manager or email support@evolvemep.com. Below, you’ll find an overview of the process and the key information your IT team may need to successfully implement SSO for your organization.
Requirements
- All users must be on EVOLVE 9.0 or greater, which supports Revit 2023 or newer.
- For Revit 2022 support, EVOLVE 8.2.7 must be installed.
- 360sync is not support for SSO, a user account can be setup as non-SSO as a workaround
- Once the account is set up, a meeting with IT & at least 1 Revit user will need to be avilable for a 30min call to complete the implementation
- During the implementation phase, your account will need 2 system admins.
- Updating to SSO does create a new user id for company members, so things like usage analytics will be impacted as the data will capture usage for 2 different id's even though the email is the same.
- Outside vendors (users without a company domain) can not be on SSO.
Process
- EVOLVE will activate your account to enable SSO
- Initial admin setup which will activate 2 accounts on SSO
- Admin 1 will delete Admin 2
- Admin 1 will re-invite Admin 2 and assign Admin role to the user.
- Admin 2 will delete Admin 1
- Admin 2 will re-invite Admin 1 and assign Admin role to the user.
- Add additional entitlements to each user if needed (Electrical, Mechanical, Shop, etc)
- Now both admins have enabled SSO and when logging to both the website or Revit, user should be prompted to utilize their SSO authentication.
- Note: Some web browsers may need to have the cache cleared (Ctrl-F5) after this change is made
- Once the account Admin has been switched over to SSO, they will need to delete every company member and re-invite each member back and assign their role and entitlement.
- Note: that all future new user invites into the system will automatically be enabled with SSO
IT Requirements
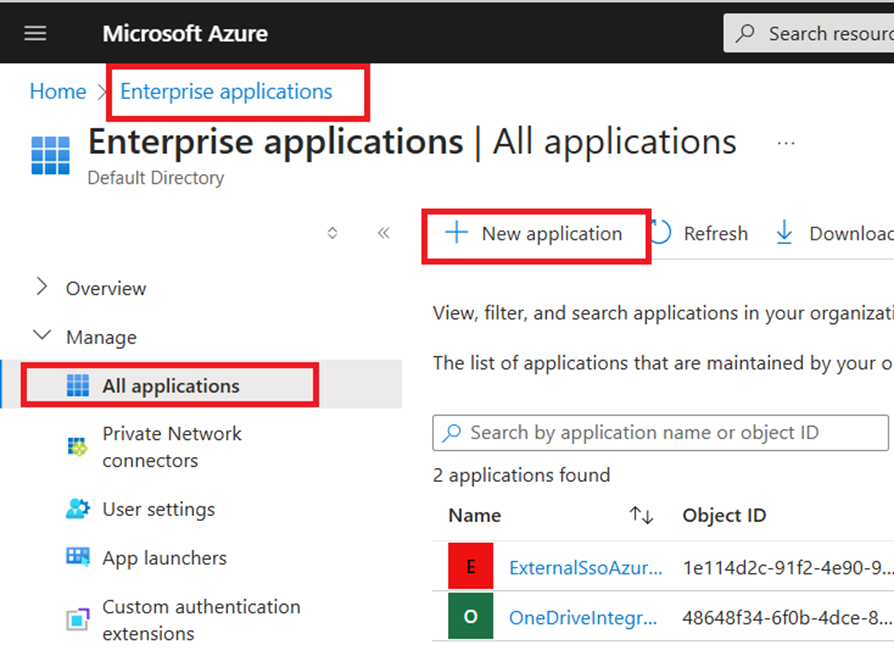
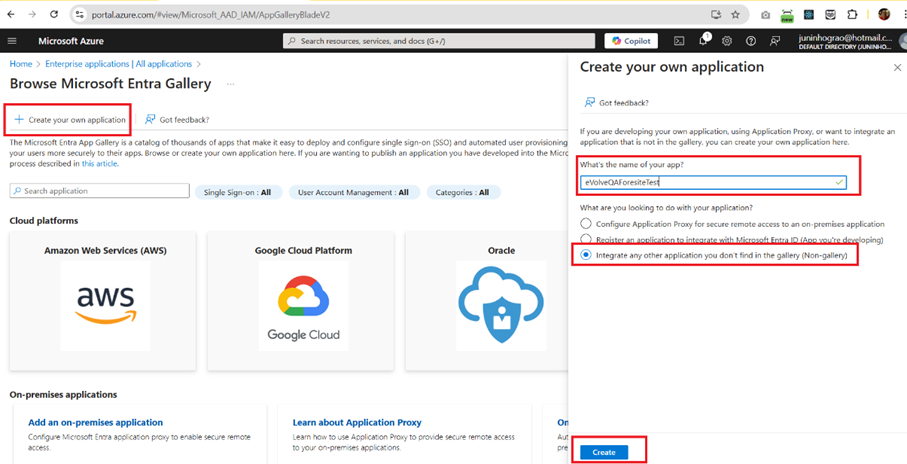
- Go into Azure Entra ID / Manage / All Applications, then click on + New application button
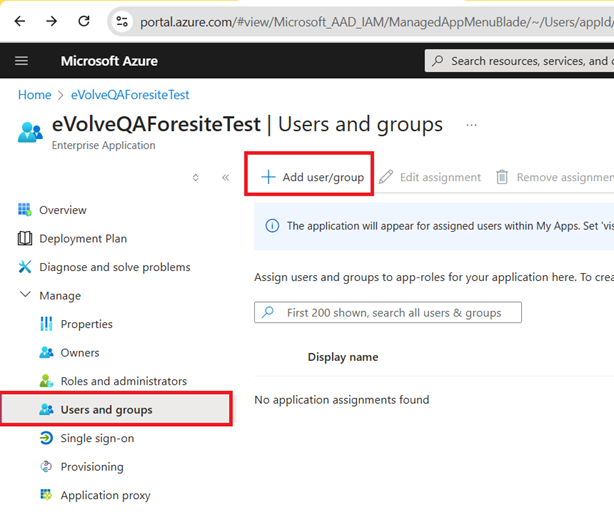
- Add the user into the application
- Click the Users and groups option in the left menu then click on + Add user/group button
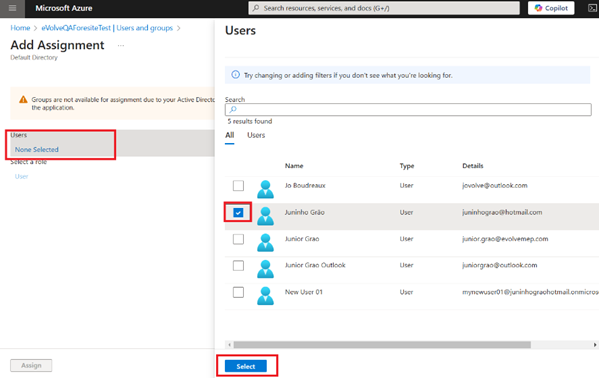
- Click in None Selected, Then use the check to select the user(s) from the list, finally press the Select button on the bottom
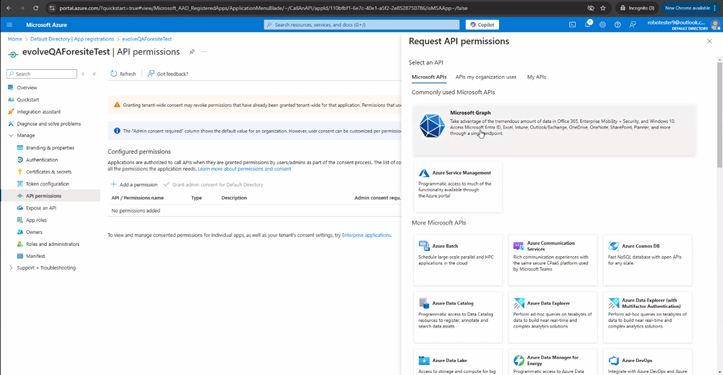
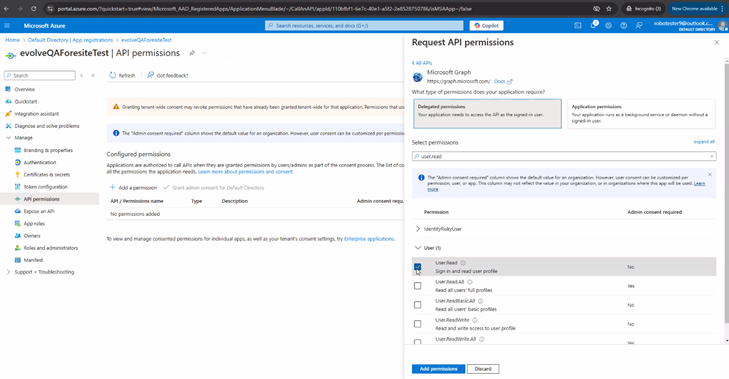
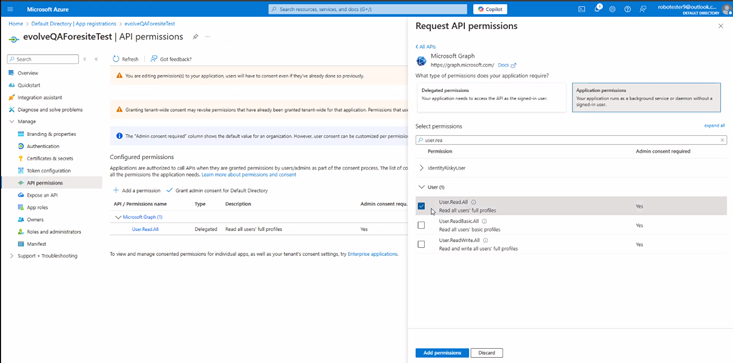
- Grant delegate and application permissions for the role User.ReadAll
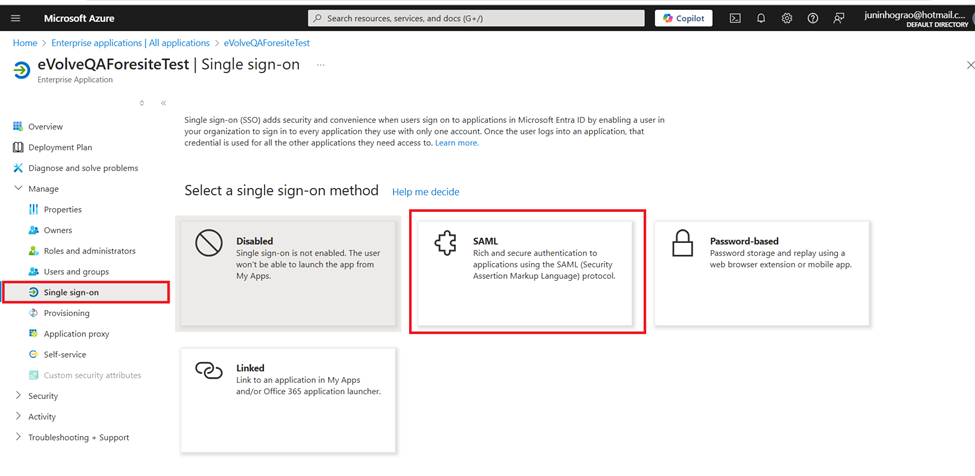
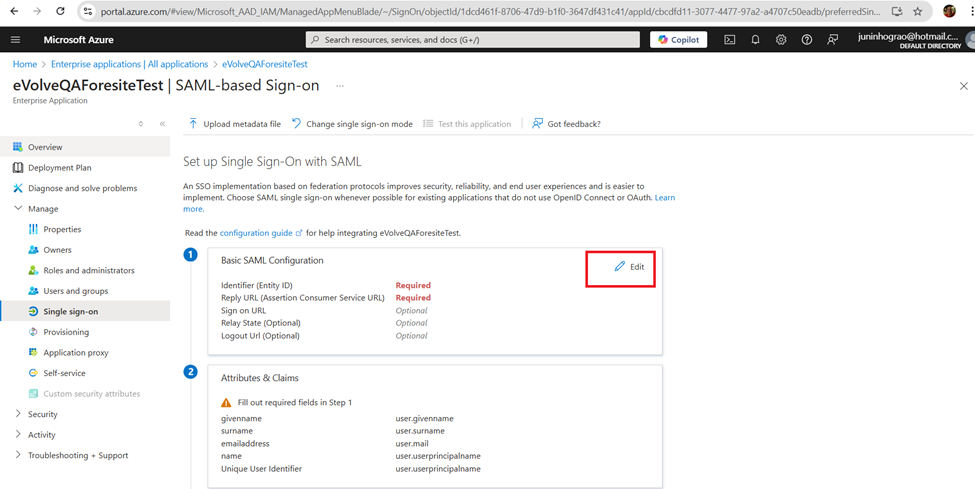
- Setup SAML application in Enterprise applications / Manage / Single sign-on / SAML option
- Click in Edit button from Basic SAML Configuration panel
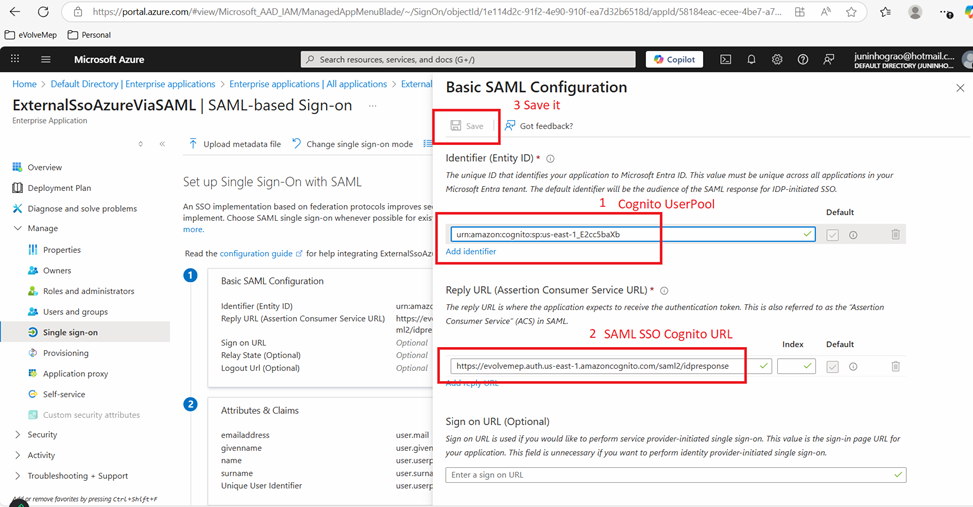
- Click in the Add Identifier and Add reply URL, then input:
- Cognito UserPool: us-east-1_E2cc5baXb
- SAML SSO Cognito URL: https://evolvemep.auth.us-east-1.amazoncognito.com/saml2/idpresponse
- Click on Save button
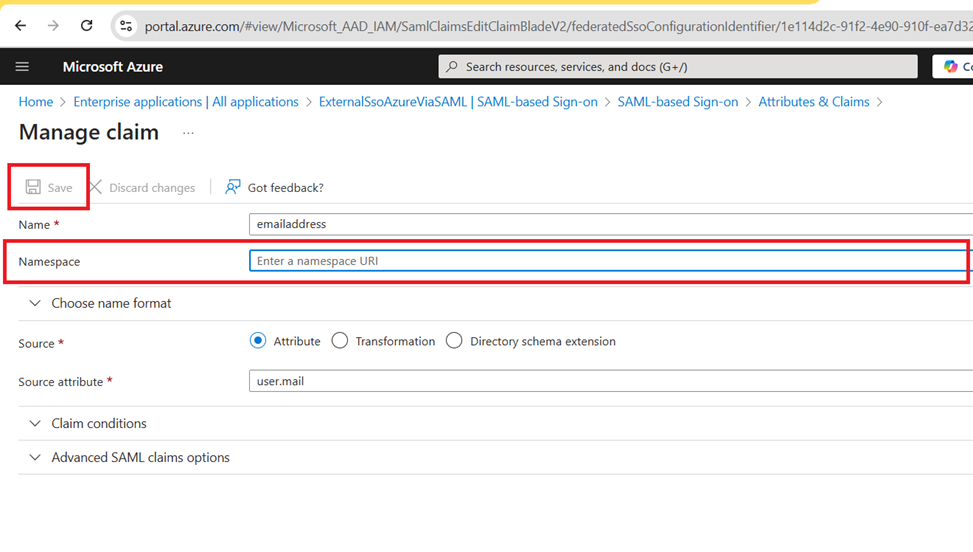
- Click the Edit button to change the attributes:
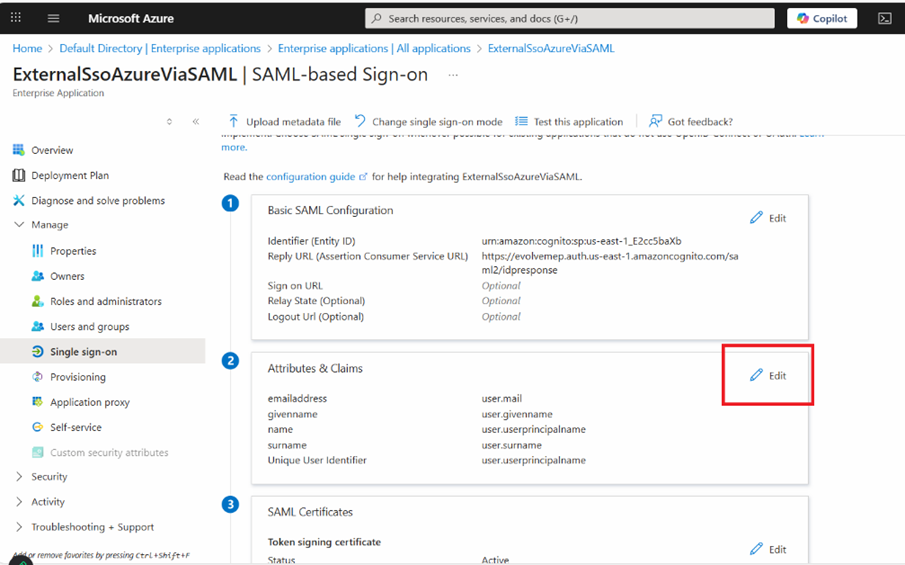
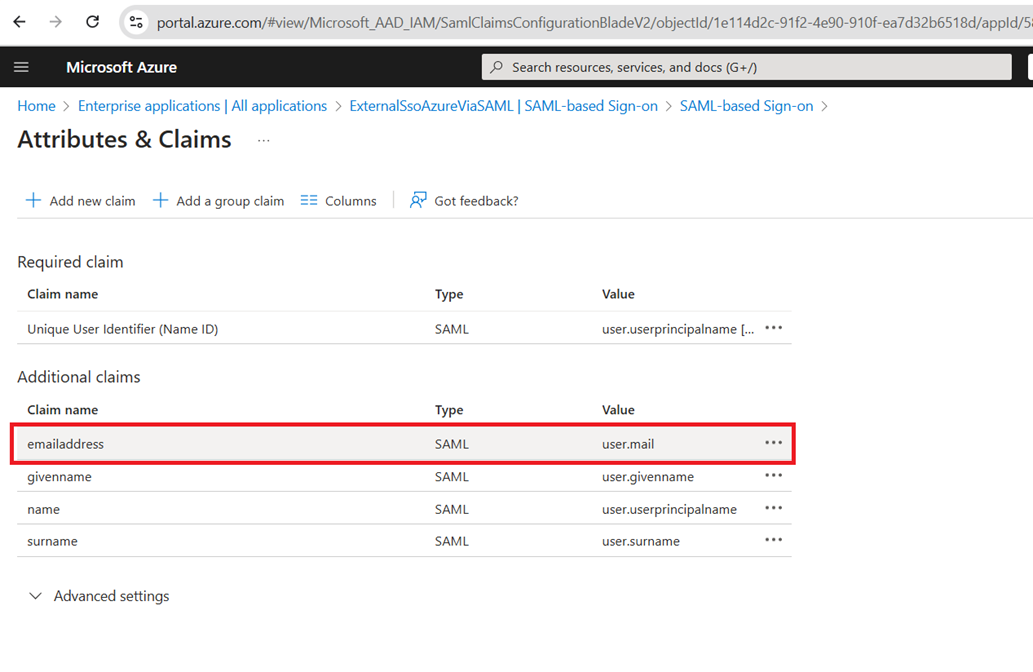
- It is recommended to clean up the Namespace field if this is not needed, then click on the Save button
- Copy and send this App Federation Metadata Url to the EvolveMep team, here is an example of this URL:
https://login.microsoftonline.com/276ec0b5-dac8-4bd5-b0cd-e068bf17cb64/federationmetadata/2007-06/federationmetadata.xml?appid=110bfbf1-6e7c-40e1-a5f2-2e8528750786
