Zebra Hardware Setup
Hardware to Purchase
The Zebra scanner we use is a collection of parts.
Scanner P/N: DS3678-XR6F003VZWW
Base P/N: STB3678-C100F3WW
Base/USB power splice cable P/N: CBA-U42-S07PAR
DC power supply P/N: PWR-BGA12V50W0WW
DC Power cable: CBL-DC-451A1-01
AC Power cable: 23844-00-00R
The Zebra printer we use is the ZD421. P/N: ZD4A042-D01M00EZ

Zebra Barcode Scanner Setup
Download the Zebra Scanner SDK from the Zebra website, or use the link:Zebra site
Install the Scanner Driver.
Insert the battery in the scanner.
Plug in the Zebra Scanner base into the power adapter.
Plug the power adapter into wall power. (Allow system to charge)
Scan the Return to Factory Defaults QR code.
Plug the Scanner base into the computer with the drivers installed.
Scan the bar code of the base to connect the scanner to the base.
Scan the "SNAPI With Imaging" QR code in the Zebra provide setup document.

Zebra Printer Setup
Download the Zebra printer software and driver from the Zebra website, or use the link: Zebra Designer 3 & Zebra Driver
Install the printer driver and the printer software.

Zebra Label Design
Overview

Zebra Designer is a Windows application for designing labels to be used with a Zebra label printer. It is a standalone application not supported by Evolve. The following are instructions for building a smart label to use
Configuration Setup

This device requires the Zebra Designer 3 Label Design Software to be installed on the Windows machine.
Configuration of the label is done inside the Zebra software.
Key Configurations
- Select Printer:
- Select the type of printer you plan to use for the label.
- Define Label:
- Select the type of label, rolls, sheets, etc.
- Select the label orientation.
- Define the label size.
- Build Label Template File:
- Use the Text, Barcode, and Picture tools to build your label.

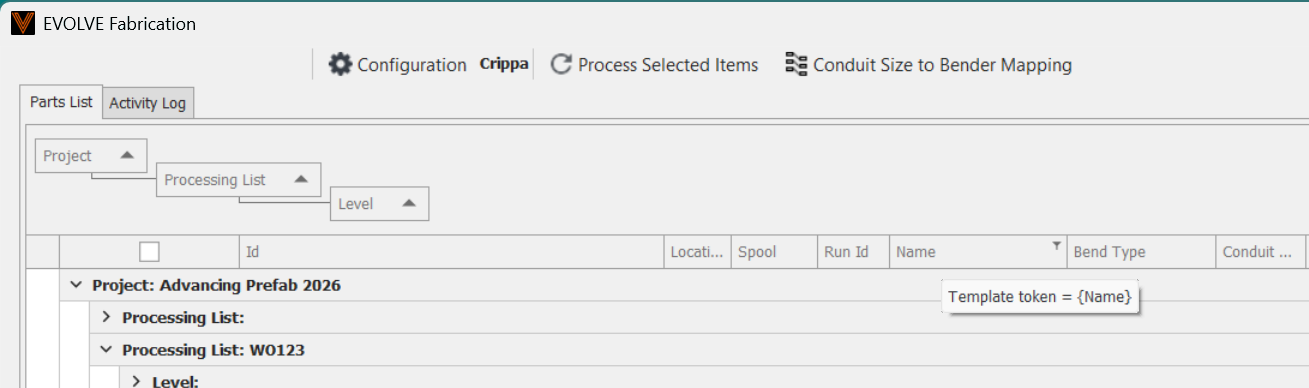
- Collect the Token names you wish to include on your label by hovering the cursor over the column.
- Select images you wish to include.
- Clicking Embed is suggested. If you don't the image must remain in the folder.
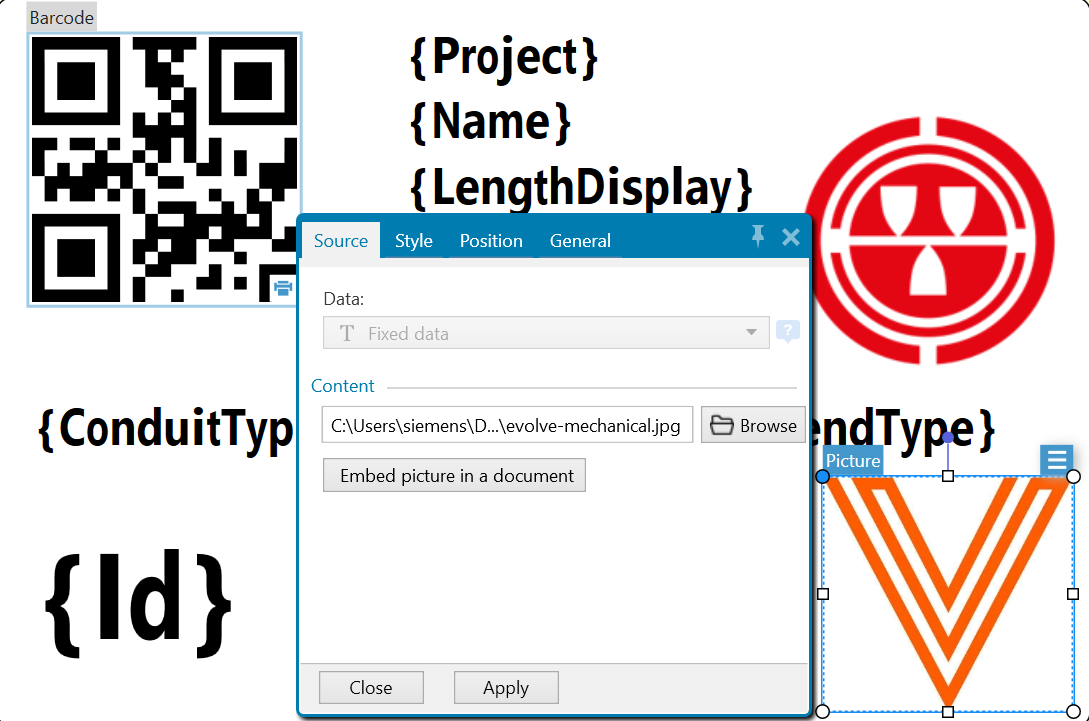
- Add text to the label.
- Using
{}will allow for inserting of the token from the Evolve Fabrication client.
- Using

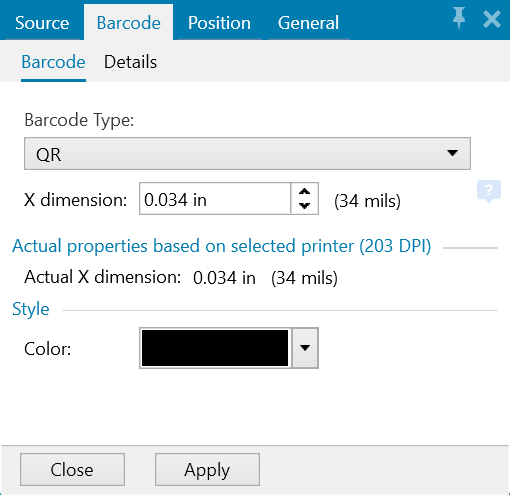
- Add the QR code
{Id}is the required token.
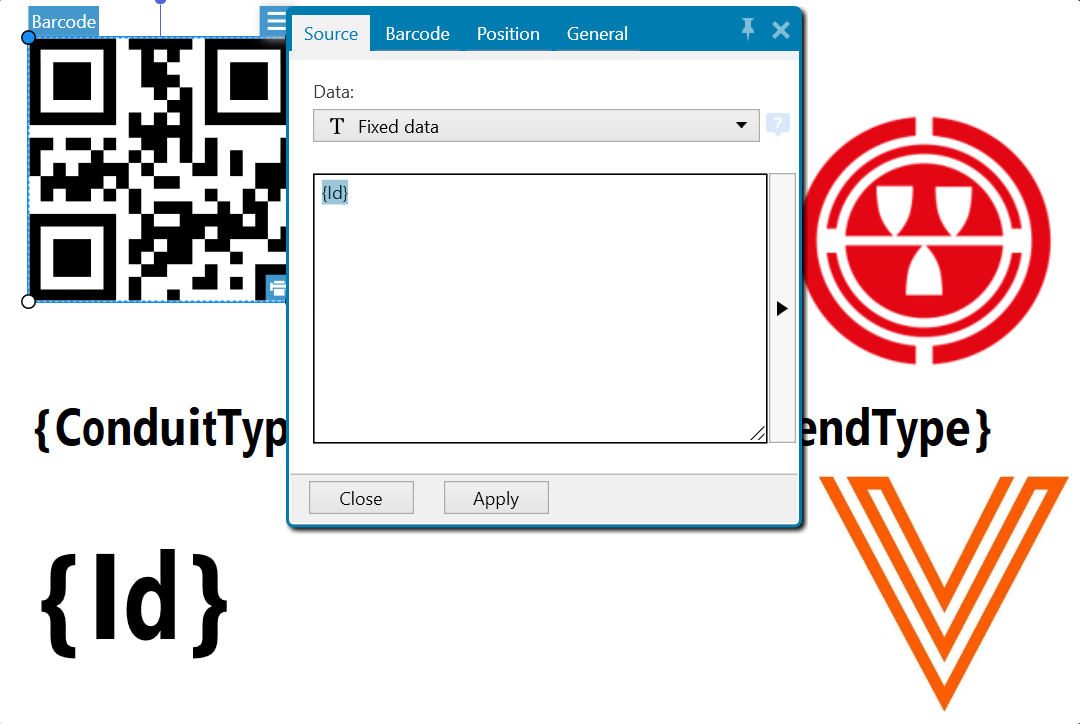
- Select the type of code to be QR for use with the Zebra Scanner.
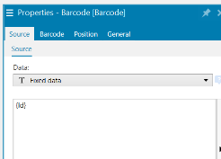
- Select the Source
- Data: T Fixed Data
- Token: {id} should be added in the displayed window
- Use the Text, Barcode, and Picture tools to build your label.
Generate Label File
- The Evolve Fabrication Client uses a
PRNfile to populate token fields and print the label. - To create the
PRNfile simply select print within the Zebra Designer and select the check box "Print to file"

- This will export the label design to a
PRNfile.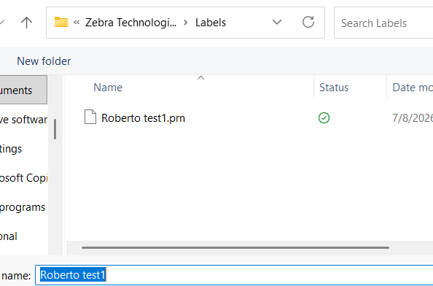
Printing your labels
- In the web, open the Evolve Fabrication app
- Select Configuration
- In the Configuration Profile
- Select: Zebra Label Printer
- Check "Automatically process barcode scanned entries" box.
- Under Devices, check the boxes for:
- Zebra Barcode scanner or Generic Com Scanner - Depending on scanner used
- Zebra Label Printer

NOTE: If you are setting up a QA station, you will need to select the Appropriate profile in the drop down menu, and check the necessary boxes in Device table
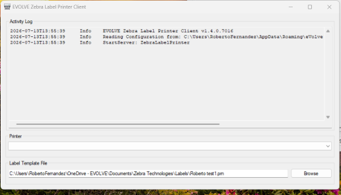
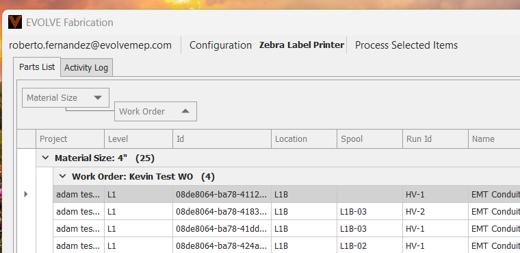
- On the Evolve Zebra Printer Client Window
- Select Printer from the drop-down menu
- Enter the .PRN file location under the Label Template File window.