Generic COM Scanner
![]() Updated 1 month ago
by
Adam Heon
Updated 1 month ago
by
Adam Heon
Instructions on Setting Comm Port for Scanavenger Scanner
Purpose of these guidelines is to provide a simple step by step of configuring your Comm Port in order to connect your scanner using the Comm Port setup in Windows.
Prerequisites:
• Ensure to remove the dongle in your scanner unit prior to starting this procedure
o Dongle is located on the bottom of the unit’s base
• Connect unit to your system
Setup
1. Download the COM Port Driver (Virtual-COM-Port-Driver.exe) using the provide link
2. Ensure your dongle is NOT connected.
3. Right-click on Virtual-COM-Port Driver.exe and “Run as Administrator” to start installation
4. Press Install
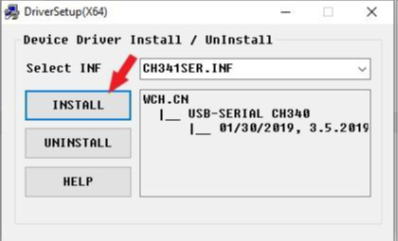
5. A confirmation message will appear, indicating a successful installation.
6. Proceed to scan the barcode below.

7. Connect the USB Dongle
8. Windows will automatically recognize the scanner
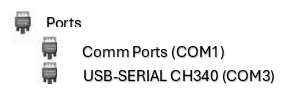
9. To verify the connection, open Windows Device Manager and check under Ports.